So most of us have at least looked at our Moodle since the upgrade this August. Most of the changes are in the appearance and layout of the site. Moodle has become a bit more ‘streamlined’ in its appearance and there have been changes in where different functions are located. In an effort to help us all make the transition to the new Moodle environment, I wanted to give the campus a list of a few things that can help you navigate around a bit easier.
How do I switch my role to student so that I can view my Moodle page as a student would?
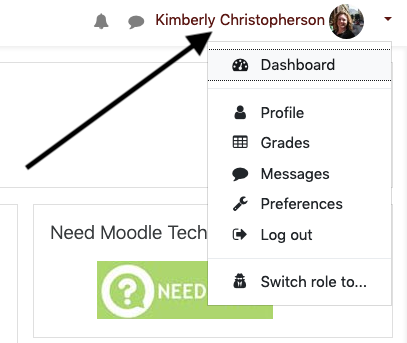
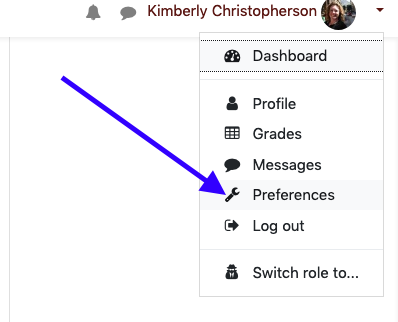
It can be very helpful to see and/or demonstrate what a course Moodle page looks like from the student’s viewpoint. To do this the instructor will need to click on their name at the top right-hand side of the Moodle page and then select “switch role to” from the dropdown menu that appears.
How do I add blocks (like QuickMail) to my Moodle Course?
Moodle offers a number of different types of ‘blocks’ where different types of information or function can be added to courses. To find how to add these, you will need to first ensure that you have Turned Editing On (click the gear at top right hand of a Moodle course), and then you will find the “add block” function at the bottom of the left hand navigation of the site.
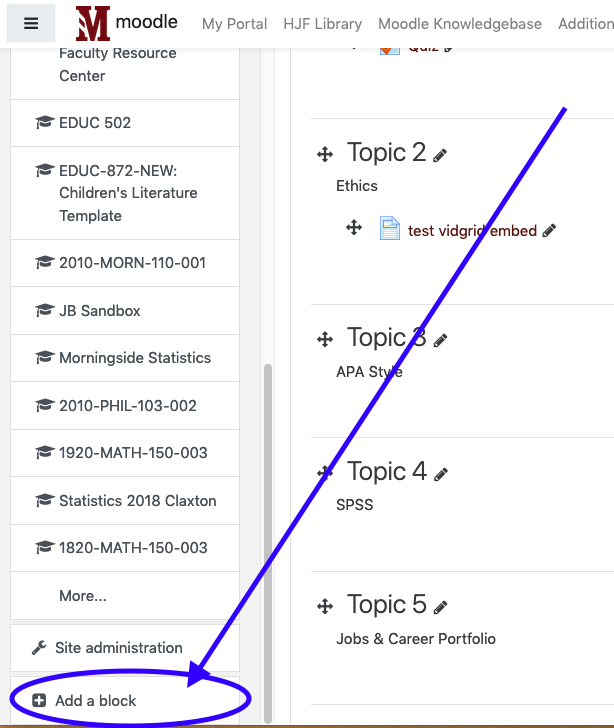
In addition to this menu function moving, there is another new feature to Moodle in that the screen is now responsive for the size of the screen the page is being viewed on. What this means is that if you keep your browser window small on your screen, the blocks may show up on the bottom of the course rather than on the right-hand side of the course. On a computer simply making your browser screen larger should make it so that the blocks will show on the right-hand side of the screen. On mobile devices, the blocks may only normally be visible at the bottom of the course. So if you or your students have a difficult time finding blocks, this may be the reason why.
Changes in Forums
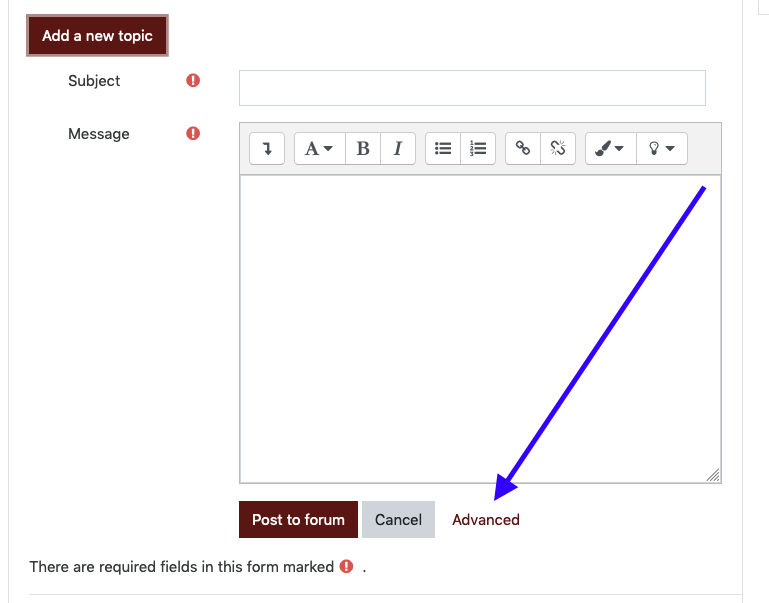
One major change made in the forums to help with appearance and usability is that when posting to forums users are no longer necessarily directed to a ‘new page.’ However with this change it looks like some functionality has gone away (like posting immediately without delay or the ability to add attachments). These functions are still here (along with a new option for instructors to reply privately) but to access these the “advanced” link needs to be clicked.
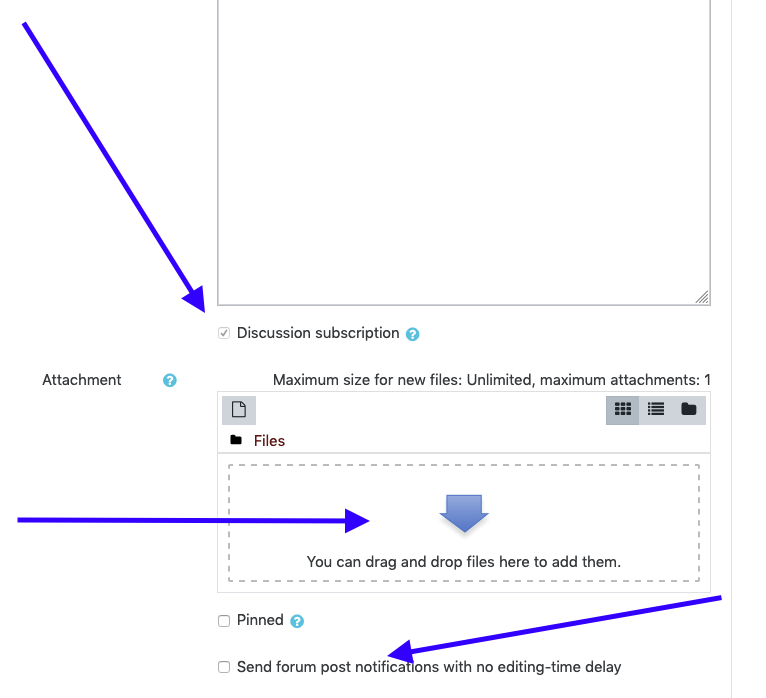
Once selected then a new screen appears with many of the functions instructors used in the old Moodle including choosing whether that discussion post is subscribed to, sending posts immediately without delay, and adding attachments.
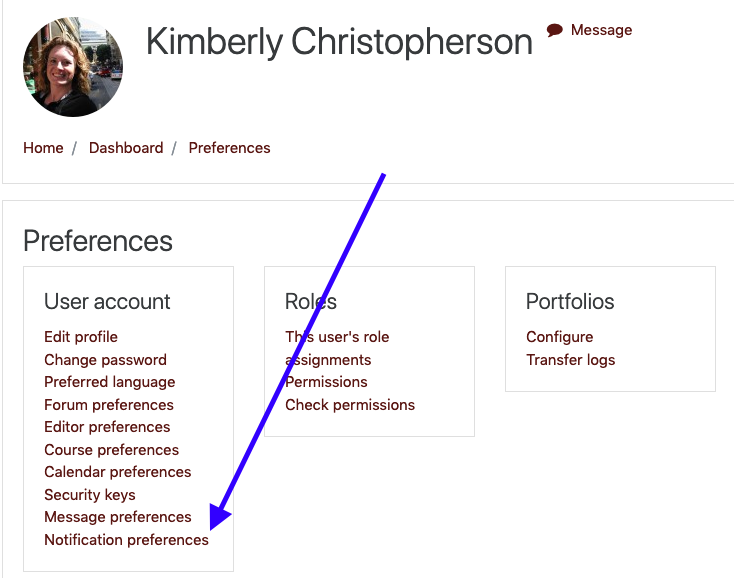
Another Forum tip in case folks want this, instructors can choose to make it default that they do not receive e-mails (notifications) of new discussion posts for their account (across all courses in Moodle). To do this, click your name in the top right hand corner and select preferences.
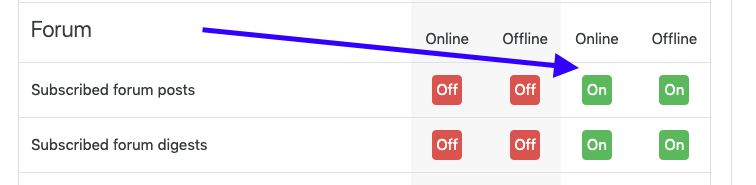
From here select Notification Preferences, scroll down to Forum and turn off the notifications here. This only affects YOUR account, not the students’ accounts.
Changes in Manual Grading for Quizzes
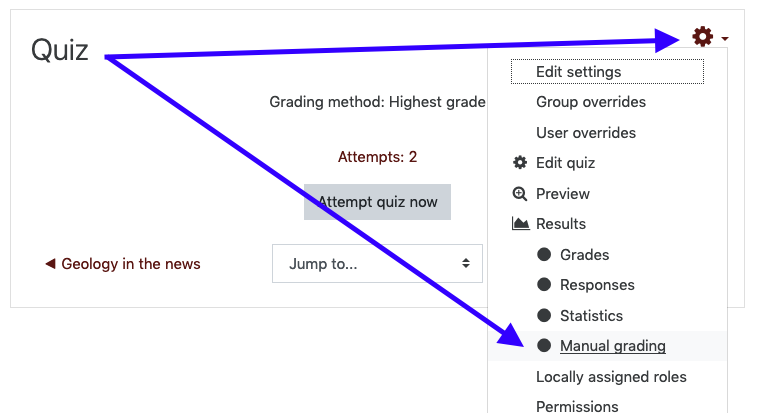
Many people use Moodle to give exams and quizzes in their courses. If there are items that are text-based (essays, short answers) there is a way to see all student responses on the same screen to make manual grading less click intensive. To get to this function has changed a bit. First, click on the quiz that you plan to grade and then click the gear on this page. DO NOT CLICK THE ATTEMPTS! You cannot access the Manual Grading feature from here.
Related to the Quiz activity, where you go to import question banks has moved as well. This change will be discussed soon.
Changes in Assignments
There have been a few changes in the Assignments activity, but the one that I want to focus on for this post is to highlight a change to how files are downloaded if an instructor uses the “Download All” function. The Download All function is very handy because it can same time, can automatically name files with the student’s name, and make conducting a bulk upload of feedback files possible (must have the file named in a special way).
When you do into view submissions, at the bottom of your student list you will see an Options section with three boxes checked. If you leave the “Download submissions in folders” checked then every single student submission will be in its own folder and the file will be whatever the student named it.
If you want to download all of the submissions in the old way (all into one zipped folder with files automatically renamed with names and the ability to use these files to do a bulk upload) then you will need to uncheck this box.
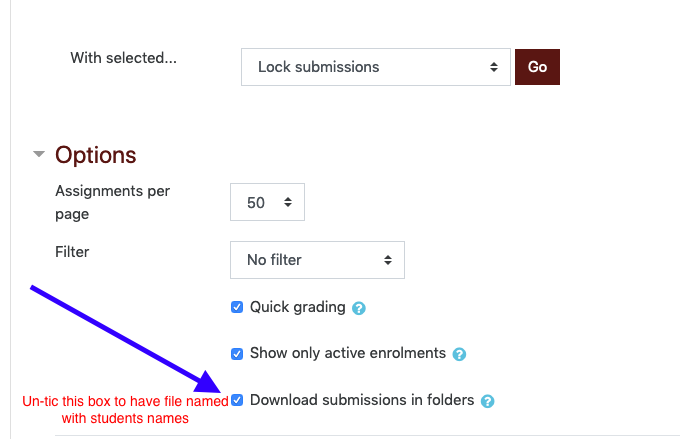
Unfortunately, at this time, there is not an administrative option to make this box a default ‘no’ so it is up to individual instructors to uncheck this box if you want to use the Download All function like in the previous version of Moodle.
Changes in Accessing other Administrative Functions
With the old Administration block removed, much of the functions that were present in that block are now in the gear on the top right hand side of a Moodle course. Functions such as accessing the Gradebook Setup, Backup/restore, and Import are clearly visible.
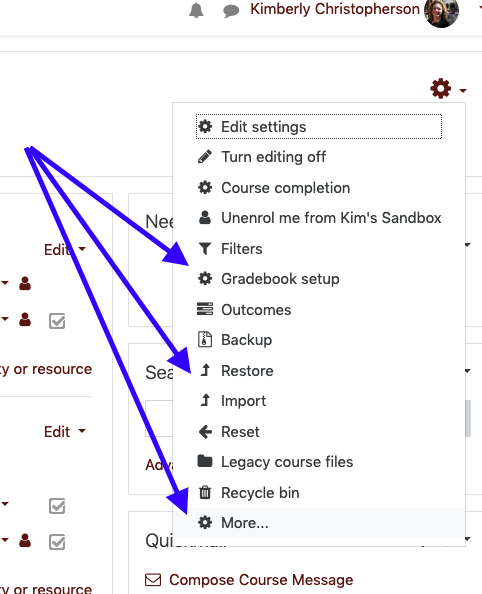
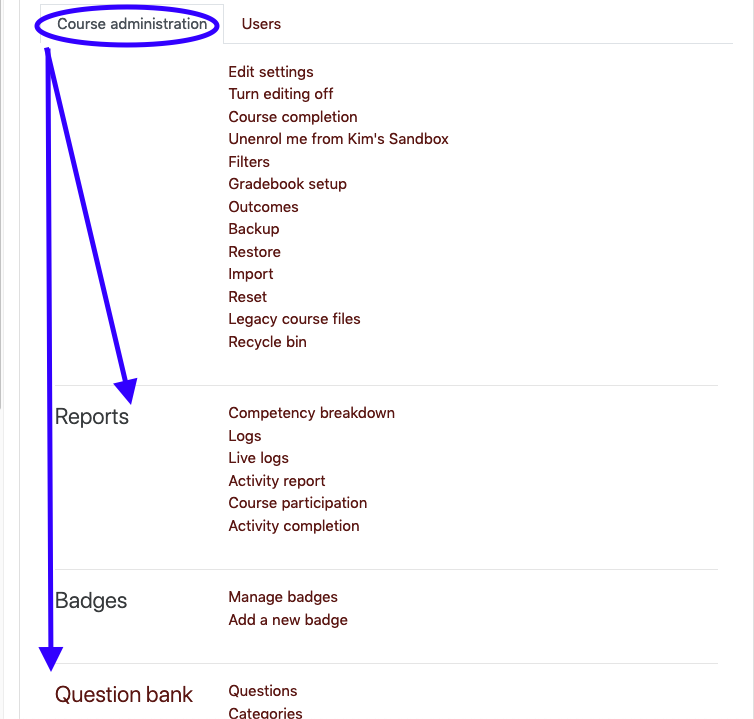
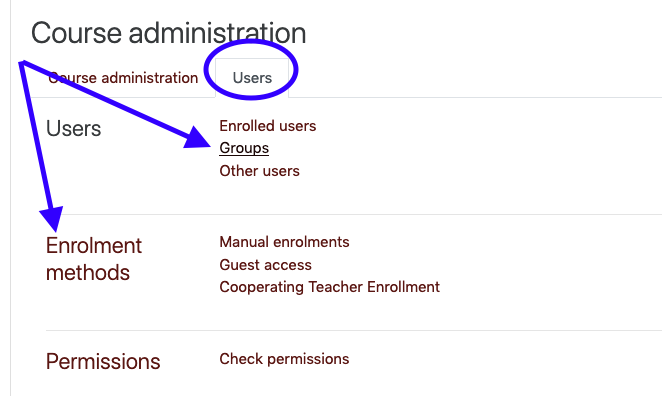
Hidden within the “More” link are other functions such as: Reports, Importing Question Banks, Creating Groups, and Adding Enrollment Methods (course meta-links).
Hopefully this post can serve as a quick reference as we are all getting familiar with the new Moodle organization. These tips were selected because these are ones that were asked of me the past several days. This is by no means an exhaustive list of all of the changes. As this semester goes on, I hope to give several other posts about new features and changes to help our campus community adjust to the new Moodle interface. As always if you have questions or want me to help walk you through anything contact me for assistance.