Monthly Archives: November 2018

Active Learning Tool: Student Response Systems

This week I want to focus on a tool that many of us are probably familiar with and have likely used: Student Response Systems (AKA Clickers).  Over the past 10 years, student response systems have evolved in many ways. The earliest systems (TurningPoint, iClicker) required users to purchase software and hardware systems in order to use these tools.  A PowerPoint ‘plugin’ needed to be purchased and installed on the instructor’s computer. A receiver needed to be plugged into the system where the questions were being displayed, and students often were required to purchase their own stand-alone clicker or schools purchased clicker sets that needed to be hauled back and forth.


These early systems were expensive and cumbersome, but many who used them enjoyed the type of instant feedback that could be gathered.  Today, these systems can be at very low cost (free) and much less cumbersome. Most systems today rely on the students using their own smartphones and Internet-based programs to relay information back and forth.  Early systems tended to be restricted to forced choice (multiple choice, Likert scales, True/False), whereas today’s systems can include things like student-created drawings, open ended responses, and even short answer or essay types of responses.


There are a number of different tools that act as a student response system, and I’ll provide a list of a few that I’ve used in the past at the end of this blog post, but the central feature of all of these are to create some student interaction during a class period.  Rather than focus on the specific tools (they can all do about the same thing), I’d like to focus on the different ways you might choose to incorporate a response system into your class.


The first is as a type of formative assessment for checking understanding.  This is probably the most common use for these systems. As you build your class-time presentation (power points or whatever), you can build in concept checks for students to respond to.  Basically this replaces the instructor calling out a question and waiting for hands to go up. This is very powerful to do because now an instructor can quickly gauge whether or not the class understood the material just presented and can adjust instruction as needed.  One thing to keep in mind that though this seems easy on the surface, the task of coming up with the right questions to ask can be more work than anticipated. I tend to try to ask questions on commonly misunderstood concepts or to provide students the opportunity to try to apply the concept to a real-life example or problem.


A second method for using these systems is by using them as discussion starters.  If you are about to have a discussion on some controversial topic or topic of common disagreement, you can do a quick poll of the class to see where opinions lie before the discussion begins.  This allows the whole class to see the diversity of opinions and to recognize that they may not be the lone person in their particular belief. In the past I’ve used response systems to allow students to anonymously report their own experiences with a mental illness (such as depression, bipolar, anxiety, or eating disorder) prior to having small group discussions so that students are made aware that there are people in the class that are either living with these disorders or know people close to them who are.  This can assist in students being respectful of their comments as they have their discussions.


A final incorporation that you can use is yet another form of formative feedback.  Because more of these response systems allow for open ended answers, you can use these tools to conduct common end-of-class-period assessments such as the one-minute paper, muddiest point, or additional questions.  These are easily submitted and recorded for the instructor to read and respond to during the next class period.


Now as promised, here is a list of a few different student response systems that you can check out.
Moodle Assignment Feature: Grading options (rubrics, marking guides)

This third post in a series of Ed Tech Blog posts focusing on different options within the Moodle Assignment Activity focuses on different types of grading functions.  So far this semester, I’ve introduced the options of the Download All, Offline Grading Sheet, and the batch upload features of this tool to help grading be a bit less time consuming (less downloading/uploading time).  Today I describe two “Advanced” grading features available in the Assignment Activity: Rubrics and Marking Guides.


Many of us use rubrics when creating our grading schemes especially for larger papers and projects.  Rubrics like this are very helpful for both instructors and students because they more deliberately outline the expectations for student work.  Research does demonstrate that the simple act of providing (and describing) rubrics prior to students beginning work on their projects can help to increase student performance (cite).  Of course the students need to actually pay attention and use these rubrics as they build and revise these projects, but it does help facilitate communication of expectations.


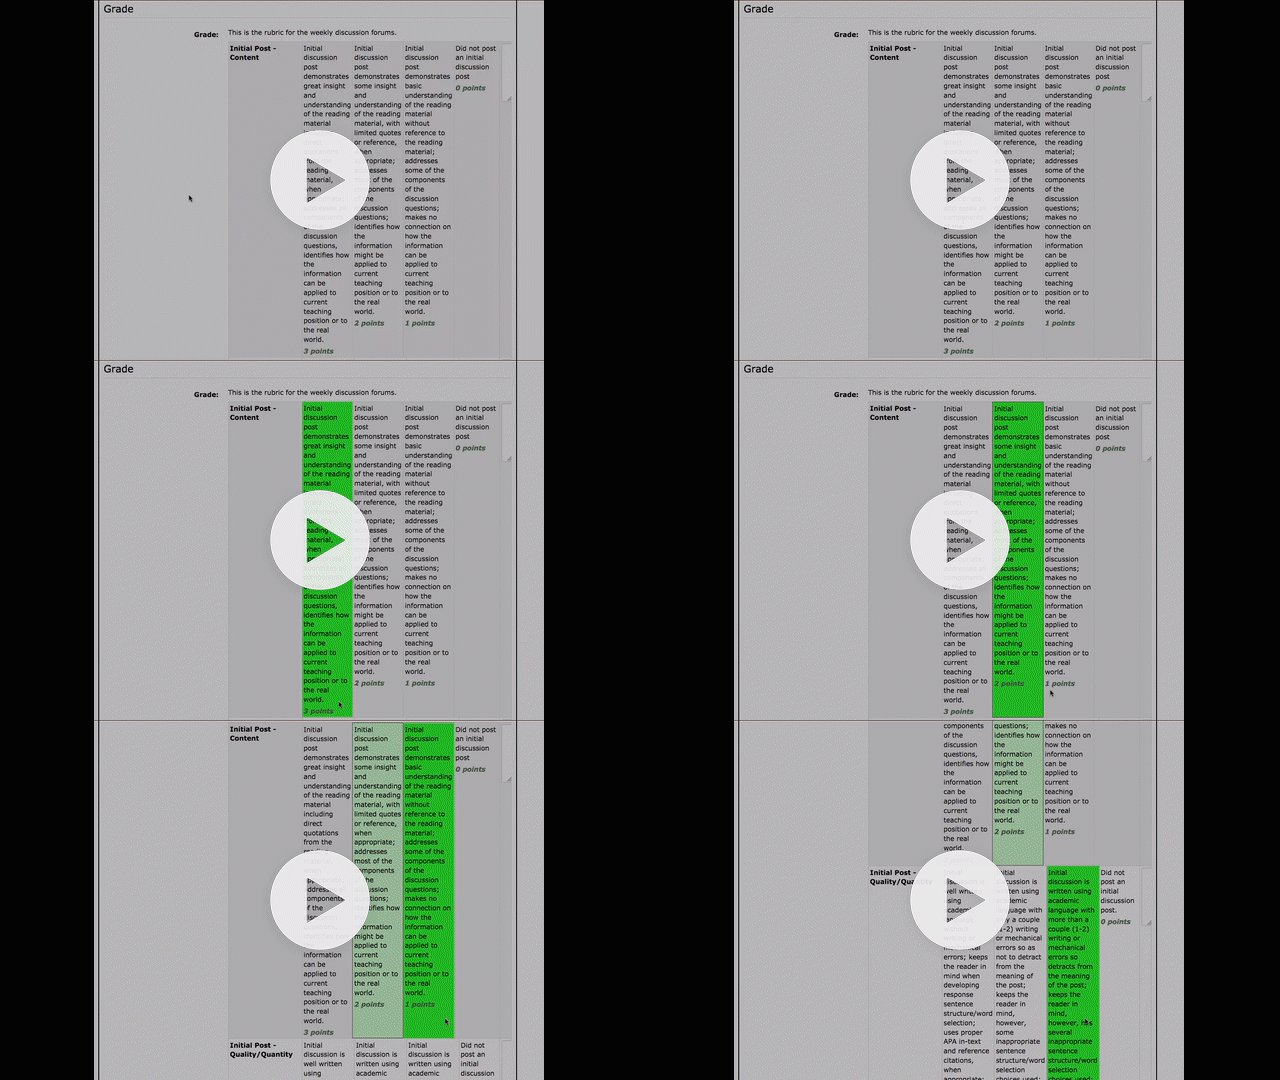
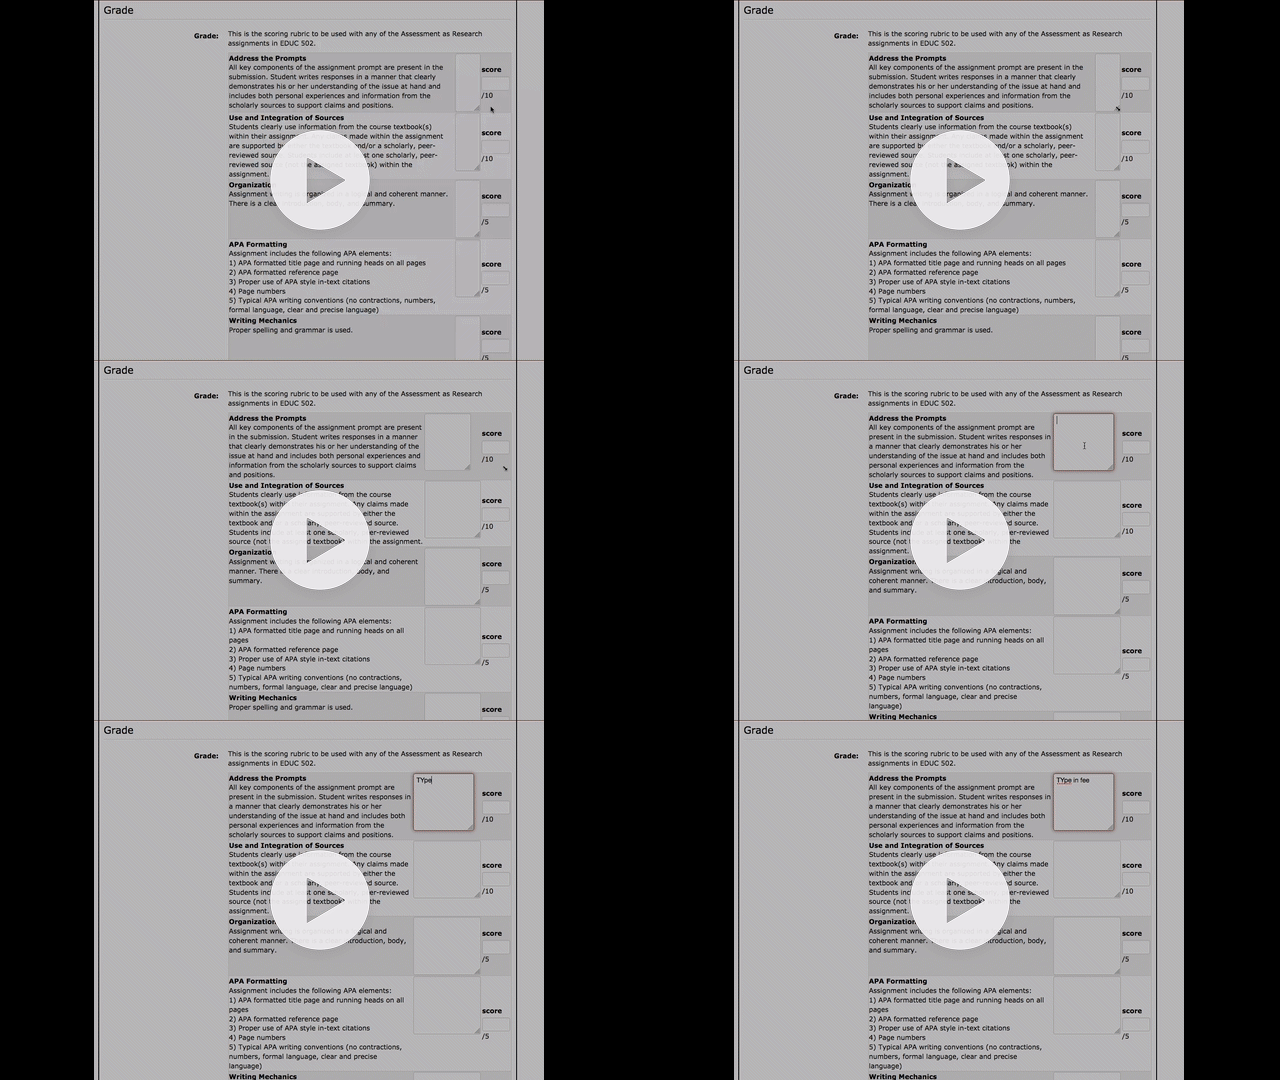
You can build your rubrics right into Moodle assignments in two ways: Rubrics (which creates boxes that you select) and Marking Guides (allows for ranges of scores to be placed in each criteria).  Here is a visual example of each type of advanced grading:


Moodle Rubrics:


Each level of each criteria has a description of the expectations and a set point value.  Instructors designing the rubric can determine the point value for each level. Rubrics make for quick grading because graders then simply click the level achieved by the student.  However, there is no option to alter the point values for each ‘cell.’


GIF of a Moodle Rubric

Moodle Marking Guides:


Criteria are listed and described and a total point value is determined for each criteria.  Graders are able to type in feedback into textboxes for individual criteria and for overall comments.  Graders are able to select a point value range that is allowed by each criteria.


The benefits of building in these types of grading structures within Moodle include being a bit more efficient with grading and scoring.  Moodle will automatically calculate the total score for you when you use these features. Rubrics are nice because graders can just click the cell they determine the student work to be at.  Additionally, you have the option of making these grading criteria for marking guides and rubrics visible to students within the assignment activity itself, so students are aware of how they will be evaluated.  Additionally, when students receive a grade they see the same rubric or marking guide and can see why they have missed points or done well.


Some weaknesses of using these grading structures include not being able to use the Offline Grading Sheet to batch upload grades.  You can still to a batch upload of feedback files, but because of the need to enter in the individual rubric criteria, the offline grading sheet is not possible.  Another weakness specifically with the Rubric option is that the points allocated to each cell cannot be altered when grading. What I mean by this is that clicking a rubric cell is an all-or-none action.  Keeping this in mind when building the rubric is important. In my own use, I have found that I sometimes ended up giving much higher or lower scores than I believed was really warranted because I was tied to the points on the rubric and these did not allow me to give more nuanced grades.  I personally tend to find the Marking Guide a nice compromise to this issue because I am able to give a range of points within a grading criteria.


Building these can be a bit time consuming and I would recommend including these in your courses after you have built up most of the rest of your course first.  You can always grade using the simple grading method. It is also possible to create rubrics that you use for multiple assignments (for example, the same rubric is used for all drafts of a paper or is used for all of a particular type of assignment).  Below is a series of videos on how to create Rubrics and Marking Guides in Moodle.

Creating a Rubric in Moodle    [Scroll down to see how to Create a Marking Guide]

Creating a Marking Guide in Moodle